How to Add a WordPress Hotel Booking System (Step by Step)
Are you looking for a way to accept direct reservations on your website without paying high commission fees to third-party platforms? Whether you own a boutique hotel, a bed and breakfast, or a vacation rental, having an automated WordPress hotel booking system is essential for growing your business.
By allowing guests to book directly, you keep 100% of the revenue and provide a seamless experience that builds trust with your brand.
In this guide, we will show you how to add a hotel booking system in WordPress using the powerful WP Hotel Booking plugin.
What is WordPress?
WordPress is the most well-known and popular website builder in the world. Originally a blogging platform, it has evolved into a versatile Content Management System (CMS) that can handle everything from simple portfolios to complex e-commerce and reservation sites.
The reason WordPress is the preferred choice for the hospitality industry is its flexibility. Through plugins and themes, you can transform a basic site into a robust WordPress room booking system that manages availability, pricing, and guest communications automatically.
Why Add a WordPress Hotel Booking System?
Many hotel owners rely on Online Travel Agencies (OTAs) like Booking.com or Expedia to get customers. While these platforms offer great visibility, they often charge commissions on every booking.
When you install a hotel booking plugin WordPress solution, you gain several advantages:
- Zero Commissions: You keep the full payment from every guest.
- Complete Control: You decide the pricing, seasonal discounts, and cancellation policies.
- Direct Marketing: You collect guest email addresses directly, allowing you to send newsletters and special offers for future stays.
- Professionalism: A high-quality WordPress hotel reservation system makes your business look more credible and established.
Steps to Set Up Your Booking System
To build a professional reservation site, we will follow these essential steps (details to follow in the next part of our guide):
- Step 1: Choose a Domain Name and Hosting.
- Step 2: Install and Set Up WordPress.
- Step 3: Install the WP Hotel Booking Plugin.
- Step 4: Configure General Hotel Settings and Currency.
- Step 5: Create Room Types and Management Attributes.
- Step 6: Add Individual Rooms and Set Pricing Plans.
- Step 7: Set Up Payment Gateways (PayPal, Stripe, etc.).
Step 1: Secure Your Domain Name and High-Performance Hosting
Before you can build your WordPress hotel booking system, you need a place for your website to live. Think of your domain name as your hotel’s physical address and web hosting as the building itself.
Choosing the Right Domain
Your domain name should ideally be your hotel’s name (e.g., www.grandviewresort.com). If the .com version is taken, consider .hotel or .vacations extensions. Keep it short, memorable, and avoid using hyphens or numbers, which can confuse potential guests.
Selecting a Hosting Provider
For a WordPress hotel reservation system, speed is everything. If your site takes more than three seconds to load, guests may abandon the booking and head to a competitor. Look for hosting providers that offer:
- One-click WordPress installation: To save you time setting up.
- Customer support: Choose a web hosting provider with a good reputation for customer support so that you get help whenever you need.
- Daily Backups: To ensure you never lose your room inventory or guest data.
Once you have signed up for a hosting plan, you will receive your login credentials to the hosting dashboard, where you can move on to the next step.
Step 2: Install and Configure the WordPress Core
Once your hosting is ready, the next phase of how to add booking system in WordPress is setting up the software itself. Most modern hosts provide an “Auto-installer” tool in their control panel.
The Installation Process
After clicking the WordPress install button, you’ll be asked to provide:
- Site Title: Your hotel’s name.
- Admin Username/Password: Make these strong to prevent unauthorised access to your reservation data.
- Email Address: Use a professional email where you want to receive booking notifications.
Once the installation is finished, you will automatically be transferred to the WordPress Dashboard. If not, you can access your site’s backend simply by adding /wp-admin to the end of your domain name.
Choosing a Hotel Booking WordPress Theme
You need a theme that is visually stunning and fully compatible with your hotel booking plugin WordPress of choice. A good theme doesn’t just look pretty; it provides the layout for your room galleries, search filters, and checkout pages.
When looking for the perfect WordPress hotel reservation system design, we highly recommend these professional options (or you can browse the best WordPress themes for travel blogs for more inspiration):
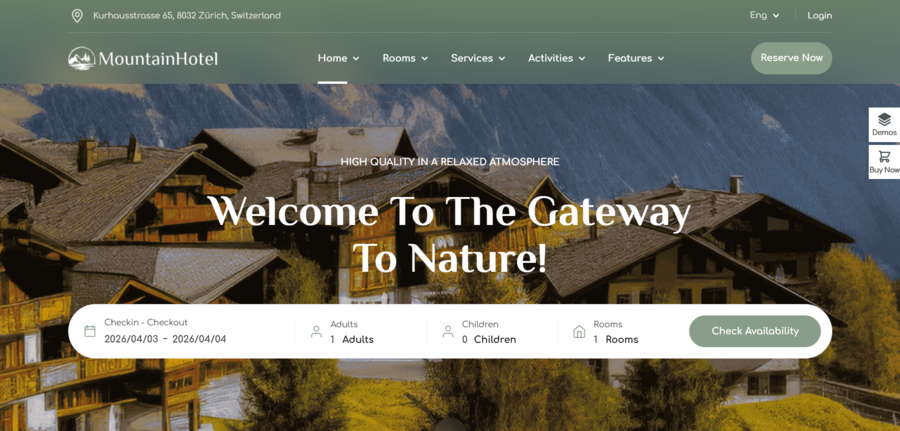
Sailing is one of the most complete themes on the market. It is specifically designed for the WP Hotel Booking plugin, featuring a beautiful “Quick Search” bar and high-end layouts that give your property a luxury feel.
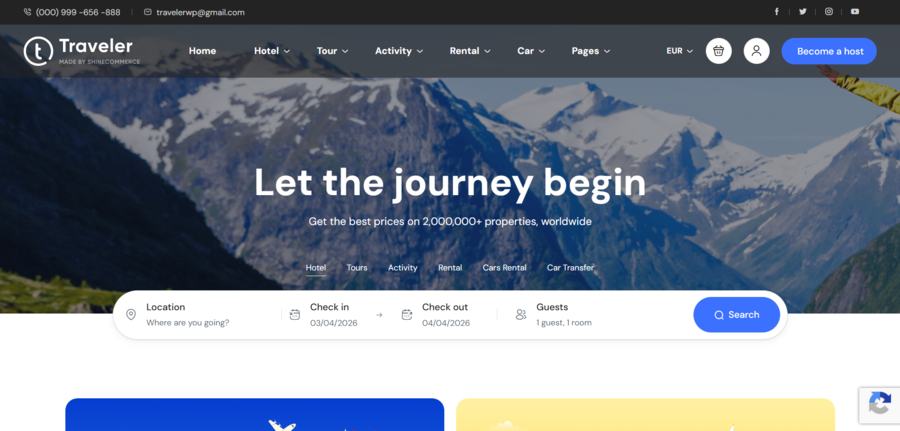
If you want a theme that can handle more than just rooms, such as tours, car rentals, and activities, Traveler is a powerhouse. It offers a massive library of pre-made demos that can be imported in seconds.
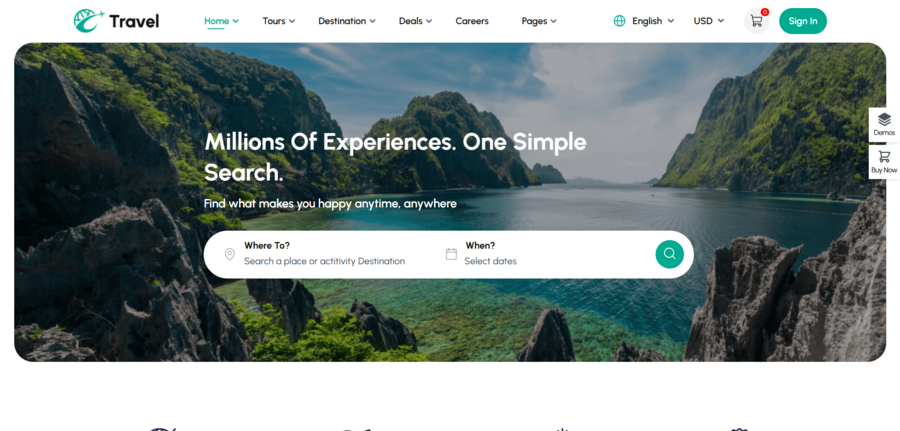
Travel-Tour is perfect for travel agencies or hotels that want a clean, minimalist design. It is optimised for speed and works seamlessly with modern booking tools to ensure your guests have a smooth reservation experience.
Step 3: Install the WP Hotel Booking Plugin
Now that your site is live, it’s time to add the actual functionality. While there are many options, using a specialised hotel booking plugin WordPress users trust, like WP Hotel Booking, ensures you have all the features needed for a professional hospitality site.
Why Choose WP Hotel Booking?
This plugin is a complete engine for your WordPress room booking system. Unlike generic contact forms, it manages room availability in real-time, handles different pricing for peak seasons, and generates reports. It is lightweight yet powerful enough to handle multiple room types and complex booking rules.
Installation and Activation
To get started, follow these steps:
- Navigate to Plugins » Add New in your WordPress sidebar.
- In the search bar, type “WP Hotel Booking”.
- Look for the plugin, then click Install Now and then Activate.
If you are a beginner, see our guide on how to install a WordPress plugin for extra help
The Setup Wizard
Upon activation, the plugin typically launches a quick setup wizard. It is highly recommended to follow this process. It will automatically create the essential pages your WordPress hotel booking system needs to function:
- Search Result Page: Where guests see available rooms.
- Check Out Page: Where they enter their details.
- Confirm Booking Page: The final “thank you” page.
By letting the plugin create these pages for you, you ensure that the shortcodes are placed correctly and the booking flow is logically connected from the very beginning. Once the wizard is complete, you will see a new menu item labelled “WP Hotel Booking” in your dashboard, signalling that you are ready to start adding your rooms.
Step 4: Configure General Hotel Settings and Currency
Once the plugin is active, the first thing you should do is configure the core engine of your WordPress hotel booking system. This ensures that your business rules, such as check-in times and regional currency, are correctly applied across the site.
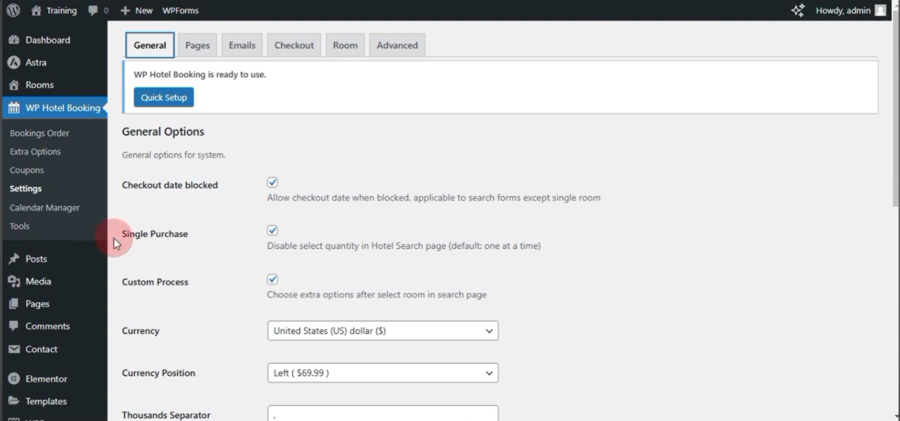
Navigate to WP Hotel Booking » Settings in your dashboard. You will see several tabs that control the behaviour of your WordPress hotel reservation system:
- General Settings: Here, you can set the Price Display, Coupon and Tax. These are displayed to guests during the booking process and on their confirmation emails. You can choose your primary currency (e.g., USD, EUR, VND) and set the currency position and thousand separators to match your local standards.
- Page Settings: This tells WordPress exactly where to direct guests when they interact with your WordPress room booking system.
- Emails: You can check and modify the name and subject of each email sent to the customers.
- Checkout: You can set a specific timeframe (in hours) after which a pending reservation is automatically cancelled if payment isn’t received. You can toggle specific methods like Offline Payment or PayPal. Ensuring the “Process” checkbox is active is what allows your guests to reach the final checkout stage.
- Room: You can define the “Number of column display” and how many rooms appear per page, and set exact dimensions for your room thumbnails. Keeping these uniform ensures your gallery looks organised and fast-loading.
Don’t forget to click “Save Settings” after every change to ensure your booking engine is synchronised.
Step 5: Create Room Types
To keep your hotel booking plugin WordPress setup organised, you need to categorise your accommodations. Instead of listing every single room individually at the start, you define “Room Types”.
Defining Room Types
Room Types act as the categories for your property (e.g., Standard Single, Deluxe Suite, or Penthouse). This allows the WordPress hotel booking system to group similar rooms together, making it easier for guests to compare options.
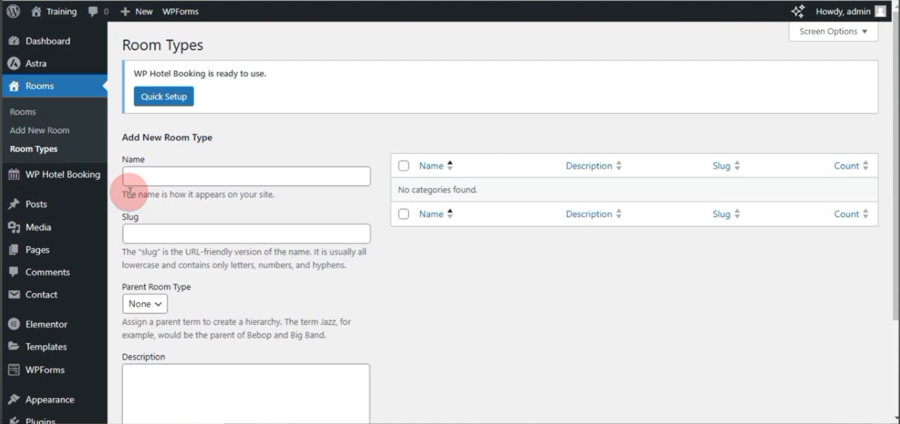
To add these, go to WP Hotel Booking » Room Types.
When creating a new category in your WordPress hotel booking system, you will need to fill in a few key fields:
- Name: This is how the room category appears on your live site.
- Slug: This is the URL-friendly version of the name. For example, if your category is “Premium Deluxe,” the slug would be premium-deluxe. This helps with the clean URL structure of your WordPress room booking system.
- Parent Room Type: This allows you to create a hierarchy. For instance, you could have a parent type called “Ocean Front” and sub-types like “Ocean Front Studio” or “Ocean Front Suite.”
- Description: While not always prominent in every theme, providing a brief summary of the category helps provide context for search engines and certain layouts in your hotel booking plugin WordPress.
Once you click “Add New Room Type,” it will appear in the management table on the right, showing you at a glance how many individual rooms are currently assigned to that specific tier of your WordPress hotel reservation system.
Step 6: Add Individual Rooms and Set Pricing Plans
This is the most important step in learning how to add booking system in WordPress. Now, you will combine your room types, attributes, and pricing to create live listings.
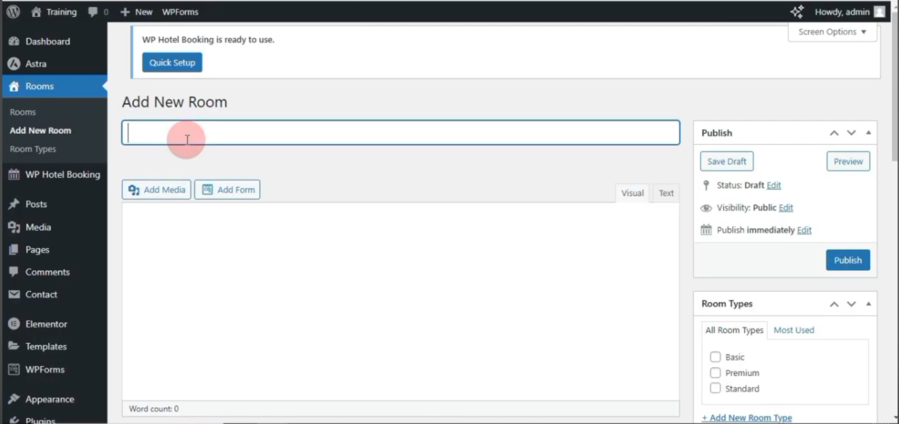
Go to Rooms » Add New Room to begin:
- Room Details: Enter a descriptive title and a compelling description. Use the “Room Gallery” feature to upload high-quality photos, as visuals are the biggest factor in securing a reservation.
- Capacity and Quantity: Set the maximum number of adults and children allowed in the room. If you have five identical “Standard Rooms,” you don’t need to create five separate posts; simply set the “Quantity” to 5, and the plugin will track availability automatically.
- Pricing Plans: WP Hotel Booking offers a flexible pricing engine. You can set a “Base Price” for regular nights and create specific “Pricing Plans” for weekends or peak holidays.
Incorporating Extra Options
To maximise your revenue, you can also add “Extra Options” such as breakfast, airport pick-up, or spa treatments. These can be configured as a fixed fee or a per-day charge. When a guest goes through your hotel booking plugin WordPress checkout, they will see these as optional add-ons, increasing your total booking value.
Step 7: Set Up Payment Gateways
The final technical hurdle in learning how to add booking system in WordPress is ensuring you can actually get paid. A reliable WordPress hotel booking system must offer secure, familiar payment options to convert visitors into confirmed guests.
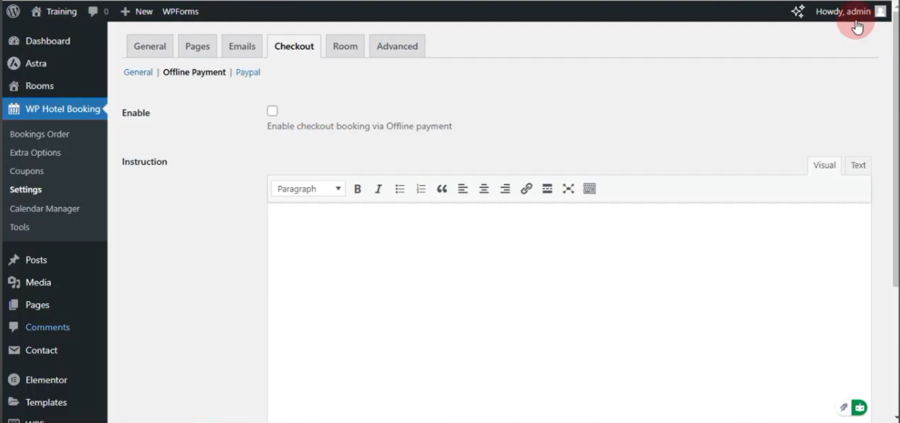
To manage your payment methods, head back to WP Hotel Booking » Settings » Checkout.
Choosing Your Payment Methods
The hotel booking plugin WordPress developers include several essential gateways out of the box:
- Offline Payment: This is perfect for smaller properties or B&Bs that prefer to handle transactions via bank transfer or cash upon arrival. You can provide your bank details in the description field so guests know how to complete their reservation.
- PayPal Standard: This is the quickest way to start accepting credit cards and PayPal balances.
- Stripe & WooCommerce Integration: For more advanced needs, WP Hotel Booking offers extensions for Stripe or the ability to link with WooCommerce. This allows your WordPress room booking system to handle a wider variety of global payment methods and local currencies.
This is the final step to add a WordPress Hotel Booking System to your website.
When you follow these steps, you have successfully transformed a basic installation into a comprehensive, professional platform.
FAQ: Frequently Asked Questions
Is it difficult to manage a WordPress hotel booking system?
No. Once the initial setup is complete, the system runs automatically. You will receive email notifications for new bookings, and the calendar will update availability in real-time to prevent overbooking.
Can I accept credit card payments on my site?
Yes. By using a hotel booking plugin WordPress, such as WP Hotel Booking, you can integrate popular payment gateways such as Stripe, PayPal,… This allows you to securely accept credit cards and deposits.
Do I need to be a developer to use a WordPress room booking system?
You do not need to write any code. Most plugins offer a user-friendly interface where you can simply fill in your room details, upload photos, and set your prices through a dashboard.
Conclusion
Setting up a dedicated WordPress hotel booking system is one of the smartest investments you can make for your hospitality business. It reduces your dependence on expensive third-party platforms, gives you full control over your inventory, and provides a professional booking experience for your guests.
By following the right steps and using a reliable plugin like WP Hotel Booking, you can have a fully functional reservation engine running in just a few hours. If you are just starting out, you might also be interested in a free travel blog WordPress theme to complement your site.
Read more: How to Make a Travel Website with WordPress (Step-by-Step Guide)
You may also like
How to Create a WordPress Booking Form in WordPress
Posted on March 27, 2026A WordPress booking form can completely change the way you run your business. By automating your scheduling, you can capture more leads, reduce administrative back-and-forth, and provide a better experience for your customers.
Whether you are a consultant, a doctor, or a small business owner, having a reliable WordPress booking plugin

How to Install a WordPress Plugin: A Complete Beginner Guide
Posted on January 20, 2026WordPress is powerful because it can be customized endlessly, and plugins are the reason why. If you are new to the platform, one of the first things you need to learn is how to install a WordPress plugin correctly.
Plugins allow you to add new features to your site without touching