How to Make a Travel Website with WordPress (Step-by-Step Guide)
Are you looking to start your own travel agency, tour company, or destination blog? In the past, building a professional booking platform required a massive budget and a team of developers.
Fortunately, things have changed. With the right tools, anyone can create a travel agency website that looks professional and functions perfectly on all devices. Whether you want to sell guided tours, offer hotel bookings, or share travel itineraries, WordPress provides the most flexible foundation for your business.
In this step-by-step guide, we will show you how to make a travel website with WordPress from scratch, without writing a single line of code.
Why You Should Use WordPress as the Best Website Builder to Make a Travel Business Site?
There are dozens of website builders on the market, but WordPress is the most popular choice.
When you choose WordPress, you aren’t just renting space on a closed platform. Unlike many other website builders, WordPress is open-source. This means you have total ownership over your site, your customer data, and your booking records. You have the freedom to move your site or change your features whenever you want.
The real advantage for agencies comes from the massive ecosystem of design tools available. You can quickly install a dedicated travel website WordPress theme that gives your business a polished look without needing to hire a graphic designer. These themes are built specifically to showcase beautiful destinations and clear itineraries.
Beyond just looking good, your site needs to function as a real business platform. By adding a specialised tour booking WordPress plugin, you can manage complex trip schedules, check real-time availability, and accept deposits from customers globally with the online booking system. This turns a simple website into a 24/7 automated sales machine.
Finally, the travel industry is incredibly competitive on search engines like Google. WordPress is built with clean, search-friendly code right out of the box. This makes it much easier to create a travel agency website that actually shows up in search results when travellers are planning their next vacation.
When you combine this SEO advantage with a custom WordPress travel website design, you have a platform that is ready to grow as your business expands. It is simply the most scalable and cost-effective way to learn how to make a travel website with WordPress while maintaining professional standards.
To make a travel website with WordPress, you need to follow these steps. We will go into the specific details of each step in the next section, but here is the essential workflow:
- Step 1: Get a Domain Name and Web Hosting
- Step 2: Install WordPress on Your Hosting Account
- Step 3: Choose a Professional Travel Website WordPress Theme
- Step 4: Create Image Galleries for Your Travel Business
- Step 5: Install and Set Up the WP Travel Engine Plugin
- Step 6: Create Your Travel Packages and Content
- Step 7: Add a Professional Contact Form to Your Travel Site
Step 1: Get a Domain Name and Web Hosting
Before you can start building, you need two essential things to create a travel agency website: a domain name and web hosting.

Think of the domain name as your business’s street address on the internet. It will be where customers enter in the search bar to find your site (like www.YourTravelAgency.com, www.Travel.com)
And web hosting is the actual house where your website’s files, photos, and booking data live. Every piece of data you add to your website will be stored here.
While the WordPress software itself is free, hosting and a domain name typically cost money. Most beginners choose a trustworthy provider that is officially recommended by WordPress. They offer a “one-click” setup process that makes it incredibly easy to learn how to make a travel website with WordPress without any technical headaches. Each provider will have a hosting plan that is suitable for your business site’s demands
When choosing your domain name, try to keep it short and easy to remember. Avoid using hyphens or numbers, as these can be confusing for customers trying to find your tours. You can select the name of your travel business for your domain name. In case someone has already used that name, you can add some words like “Go”, “Travel”, or “Tour” to make your name different.
Once you have signed up for a hosting plan and registered your domain, your hosting provider will usually send you an email with your login details.
Step 2: Install WordPress on Your Hosting Account
Once you have your hosting ready, the next step is installing the WordPress software. Most modern hosting companies have made this process nearly automatic. You will likely see a button in your hosting dashboard that says “Install WordPress” or “Create Site.”
After you click that button, you simply need to enter a site title and create an admin username and password. It is very important to use a strong password here to keep your business data secure. Once the installation is finished, you will automatically be transferred to the WordPress Dashboard. If not, you can access your site’s backend simply by adding /wp-admin to the end of your domain name.
This dashboard is where you will manage everything from your blog posts to your customer bookings. It might look a bit overwhelming at first, but don’t worry. As you continue with this guide on how to make a travel website with WordPress, you will see that the interface is quite intuitive and easy to navigate.
Step 3: Choose a Professional Travel Website WordPress Theme
Now that your site is live, it’s time to decide how it looks. This is handled by the WordPress theme, the designed templates that you used to create your site’s look.
Upon visiting your newly installed WordPress site, you will notice that it currently has the default theme activated. While functional, it is often very basic. To make a great first impression on travellers, you should find a dedicated travel website WordPress theme rather than a generic business theme. You can browse through the best travel WordPress themes to find a style that matches your vision.
A specialised travel theme often comes with built-in features like high-resolution image galleries, destination grids, and maps. You can easily add customer reviews, calls to action, seasonal pricing, and any other feature that works best for your website. If you are looking for premium options that offer a more boutique feel, there are two excellent choices we recommend from ThemeForest.
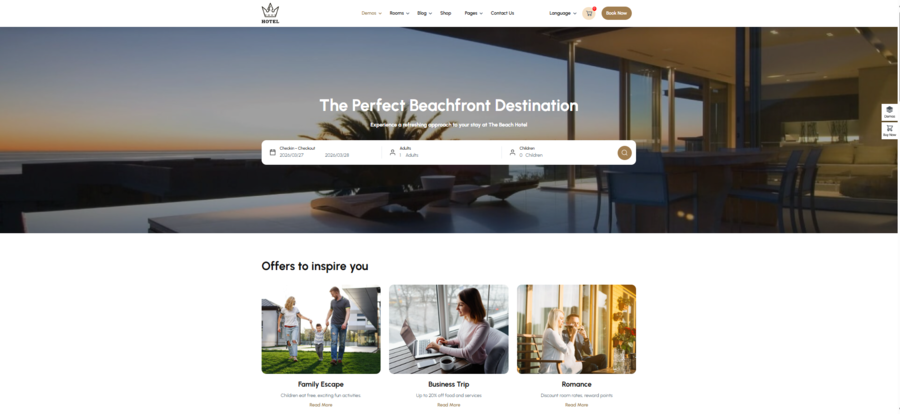
Hotel Booking is a standout choice if your travel business focuses on luxury accommodations or bed and breakfasts. This theme is designed specifically for the hospitality sector, offering a clean and elegant layout that puts your rooms and amenities front and centre. It includes features like room management and a user-friendly booking interface that make the reservation process feel high-end.
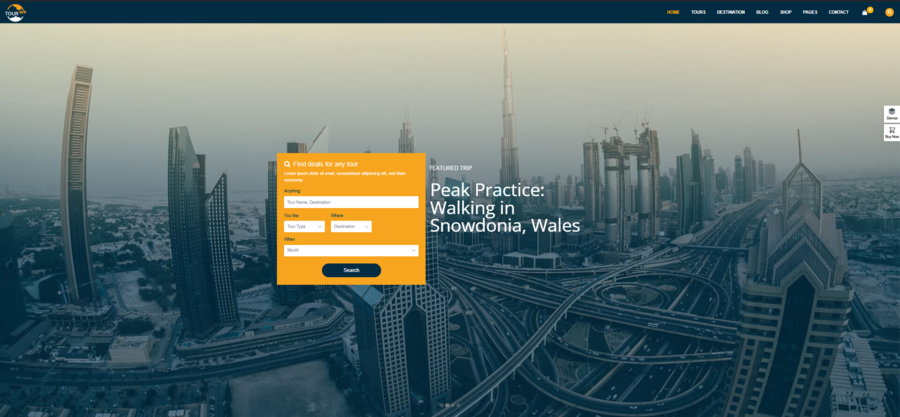
For those focusing more on excursions, city tours, or adventure travel, Tour Travel is a powerful alternative. This theme is built with a modern design that works perfectly for a create a travel agency website project. It comes pre-packed with destination listing pages and tour detail layouts, making it much easier to showcase complex itineraries to your visitors.
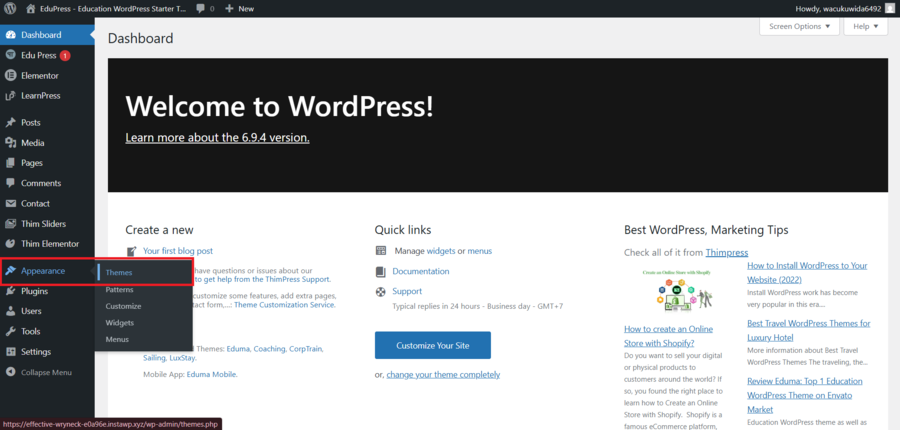
To find these or other options, go to Appearance » Themes in your WordPress dashboard. You can search for “travel” to see free options in WordPress.org, or you can purchase a premium theme from marketplaces like ThemeForest for a more high-end look.
When selecting your WordPress travel website design, look for a theme that is responsive. This means the layout will automatically adjust to look beautiful on smartphones and tablets. Since many people book their trips while on the go, having a mobile-friendly site is absolutely critical for your agency’s success.
Once you’re done choosing the tight theme, click the customise button to change every element in the website, but remember to save the changes or else it will go back to the original.
Step 4: Create Image Galleries for Your Travel Business
Visuals are the heart and soul of any successful tourism venture.
When people visit your site, they aren’t just looking for text; they want to see the crystal-clear water, the mountain peaks, or the cosy hotel rooms they are about to book. Using high-quality imagery is the most effective way to create a travel agency website that actually converts visitors into paying customers.
To start adding these visuals, you should create dedicated image galleries. WordPress comes with a built-in gallery feature, but for a professional WordPress travel website design, you might want more control over how your photos look.
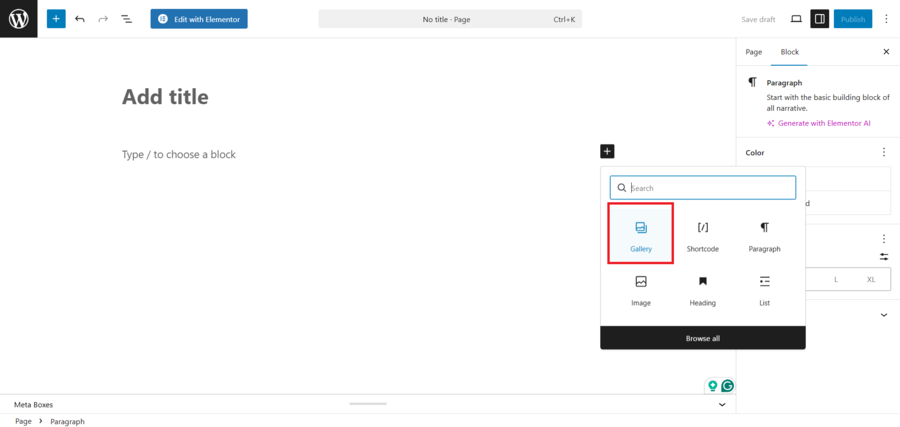
You can use the default block editor by clicking the ‘+’ icon and searching for the ‘Gallery’ block. This allows you to upload multiple photos at once and arrange them in a clean, tiled layout that looks great on any screen. Once you have uploaded the images for your travel package, you can add titles, descriptions, tags, and alt text to your images.
Finally, you just click the ‘Publish’ or ‘Update’ button to store your settings.
If you want your galleries to be truly interactive, you might consider a dedicated gallery plugin. Reviewing the best WordPress gallery plugin options can help you choose one that offers features like lightboxes or organised albums.
High-quality galleries ensure that your travel website WordPress theme looks its absolute best, giving your potential clients a taste of the adventure waiting for them.
Step 5: Install and Set Up the WP Travel Engine Plugin
Now that your site looks beautiful, it’s time to add the core functionality that allows you to manage tours. To do this, you will need a specialised tour booking WordPress plugin.
While WordPress does not have built-in functionality for a travel business, there are still many plugins on the market. You might want to compare the best WordPress appointment and booking plugins to see which features fit your workflow best.
WP Travel Engine is one of the most comprehensive tools available for those learning how to make a travel website with WordPress. It handles everything from trip durations and pricing to complex booking forms.

To get started, you have to search for the WP Travel Engine plugin, then click the install and activate buttons. Go to Plugins » Add New in your WordPress dashboard. Once activated, the plugin will usually launch a setup wizard. This wizard is incredibly helpful because it guides you through the essential settings, such as choosing your preferred currency, setting up your email notifications, and creating the necessary pages for your booking system.
Following the setup wizard is the easiest way to ensure your WordPress travel website design functions correctly from day one. You will be asked to define your “Trip” pages and “Thank You” pages.
Don’t skip these steps, as they are crucial for providing a smooth user experience and ensuring the storefront is exactly like your imagination.
If you need to know more about installing a plugin like an expert, here is a guide on how to install a WordPress plugin to help you get started.
Step 6: Create Your Travel Packages and Content
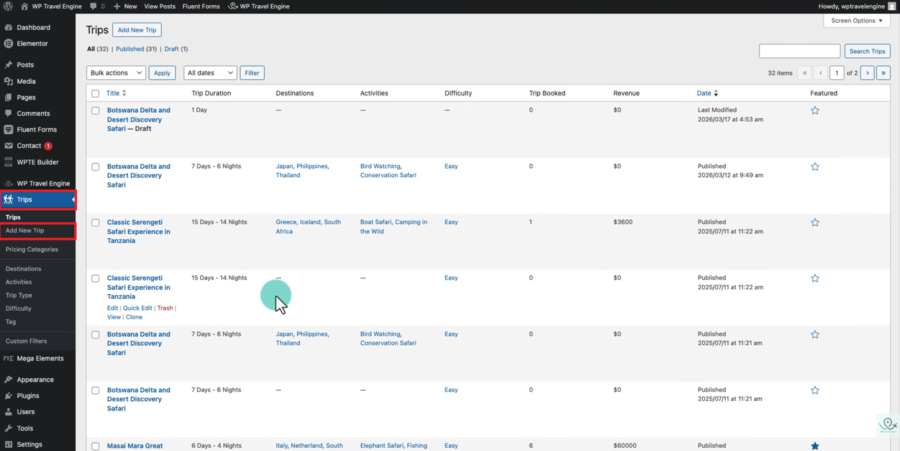
With your booking engine ready, you can now start adding the actual products you are selling. In the WordPress sidebar, navigate to Trips » Add New Trip. This editor looks very similar to the standard WordPress post editor, but it includes extra fields specifically designed for travel packages. You should start by giving your trip a catchy title and a detailed description that highlights the unique experiences your agency offers.
As you scroll down the page, you will find sections for “Trip Settings.” This is where you enter the technical details that make your tour booking WordPress plugin work. You can set the trip price, the duration in days and nights, and even create a cut-off time to avoid last-minute booking. Providing a clear itinerary is a great way to build trust with your audience, as it shows them exactly what they are paying for.
Finally, don’t forget to set a “Featured Image” for each trip. This image will appear on your main destination pages and is often the first thing a customer sees. By carefully filling out these details, you are not just listing a service; you are building a professional resource.
Step 7: Add a Professional Contact Form to Your Travel Site
While having a high-quality tour booking WordPress plugin allows customers to book pre-set packages, many travellers will still have specific questions before they commit. They might want to ask about custom itineraries, group discounts, or dietary restrictions for a specific trip.
This is why adding a professional contact form is an essential part of learning how to make a travel website with WordPress. It provides a direct line of communication between you and your potential clients, helping to build the trust necessary to close a sale.

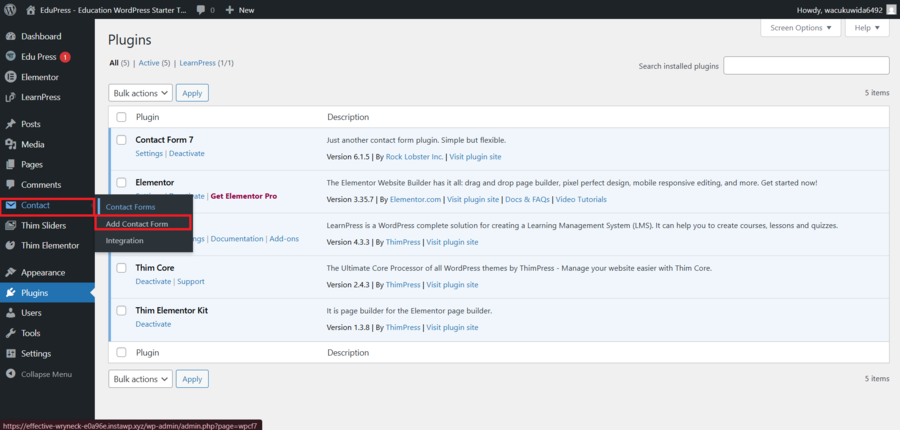
To add this feature, we recommend using the Contact Form 7 plugin. It is one of the most popular and flexible tools available for WordPress, and it works seamlessly with almost any travel website WordPress theme. To get started, navigate to Plugins » Add New in your WordPress dashboard. Search for “Contact Form 7,” then click install and activate. Once the plugin is live, you will notice a new menu item labelled ‘Contact’ in your sidebar.
Clicking on Contact » Contact Forms will show you a default form that includes fields for name, email, subject and message. However, to create a travel agency website that stands out, you may want to customise these fields. For instance, you can add a dropdown menu where users can select which destination they are interested in or a date picker for their planned travel window.
Simply click the ‘Edit’ link on the default form and use the tag generators at the top of the editor to insert these new fields into your form layout.
The next critical step is configuring the “Mail” tab within the form settings. This is where you tell WordPress exactly where to send the emails when a customer submits the form. Make sure the “To” field contains your professional business email address.
You can also customise the subject line so you immediately know the email is a lead from your website. This organisational step is vital for staying on top of your inquiries and providing the fast response times that modern travellers expect.
Once you are happy with your form settings, click the ‘Save’ button. You will see a piece of code called a “shortcode” at the top of the page.
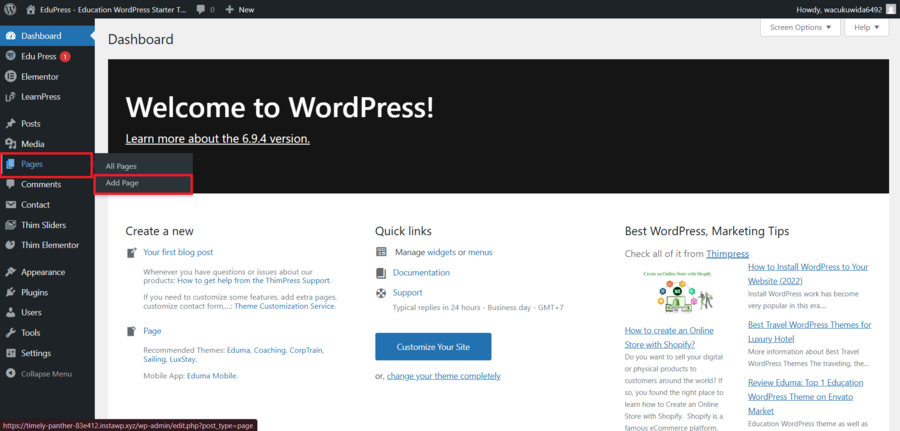
Copy this code. Now, go to Pages » Add New to create a dedicated “Contact Us” page. In the page editor, paste the shortcode into a Shortcode block. Once you publish the page, your visitors will have a sleek, functional way to reach out to you.
Adding a contact form is the final piece of the puzzle in your WordPress travel website design. It ensures that even if a traveller isn’t ready to book a package through your tour booking WordPress plugin right away, they can still engage with your brand. By following these steps, you have successfully transformed a basic installation into a comprehensive, professional platform.
Frequently Asked Questions (FAQs)
Do I need to know how to code to create a travel agency website?
No. Thanks to modern WordPress themes and visual page builders, you can build a complete site using a mouse and keyboard. You won’t need to touch a single line of code.
Can I accept online payments on my travel site?
Yes. By using a tour booking WordPress plugin, you can integrate payment gateways like PayPal, Stripe, or Razorpay so customers can pay for their trips directly on your site.
Is WordPress mobile-friendly for travel sites?
Absolutely. Most modern WordPress travel website design options are “responsive,” meaning they automatically adjust to look great on smartphones and tablets.
Conclusion
Learning how to make a travel website with WordPress is one of the smartest moves you can make for your business. It gives you the professional edge needed to compete in the digital age while keeping your costs manageable.
By combining a solid hosting provider with a high-quality travel website WordPress theme, you can go from an idea to a live booking site in just a few days.
Start building your own Travel Website today!
Read more: How to Start a Travel Blog with WordPress (With Theme Recommendations)
You may also like
Free vs Premium Travel WordPress Theme: What Should You Choose?
Posted on April 29, 2026Building a travel website is an exciting venture, whether you are documenting personal journeys or launching a professional tour agency. However, one of the first technical hurdles you will face is selecting the right foundation for your site. The debate over a free vs premium travel WordPress theme is a common starting point for
How to Start a Travel Blog with WordPress (With Theme Recommendations)
Posted on March 26, 2026Do you dream of travelling the world, sharing your adventures, and getting paid to do it? You aren’t alone. Many people want to start a travel blog, but the technical side of setting things up often feels overwhelming.
The good news is that nowadays, you don’t need to be a developer